Registering for a FAIR Account
Self-Registration Process
Before you can access FAIR, you need to register yourself as a user. You should have received a URL from your organisation, or directly from Aridhia, where you can register yourself. Follow these steps to sign up:
1. Register and verify your email address
Go to the address specified by your organisation or click the link in your email; you will be presented with a screen like the one illustrated below. Click on the 'Sign up now' link near the bottom and you will be directed to a sign up page.

Enter your email address and click 'Send verification code'. Shortly after clicking the button, you should receive an email with a verification code. Note, it might arrive in your junk mail folder. If the verification code hasn't arrived after about five minutes, go back to the website and use the 'Send new code' button.
Once you have received the verification code, enter it into the form and click 'Verify code'. If you haven't already done so, fill out the rest of the fields. You can also check out our recommendations for creating a strong password below.
Once you are finished filling out the fields, click the 'Create' button. You will shortly be directed to the phone number registration page.
2. TOTP
Aridhia environments now support time-based one-time passwords (TOTP) for authentication. This provides a more secure log in process and removes the need for SMS notifications that can be problematic in secure workplace environments. Using TOTP is very straightforward, but does require the use of the Microsoft Authenticator App on your mobile device.
The app can be found in the appropriate App stores or by scanning the QR codes for your device from this page.
You will be presented with a QR code to scan. At this point, open your Microsoft Authenticator.
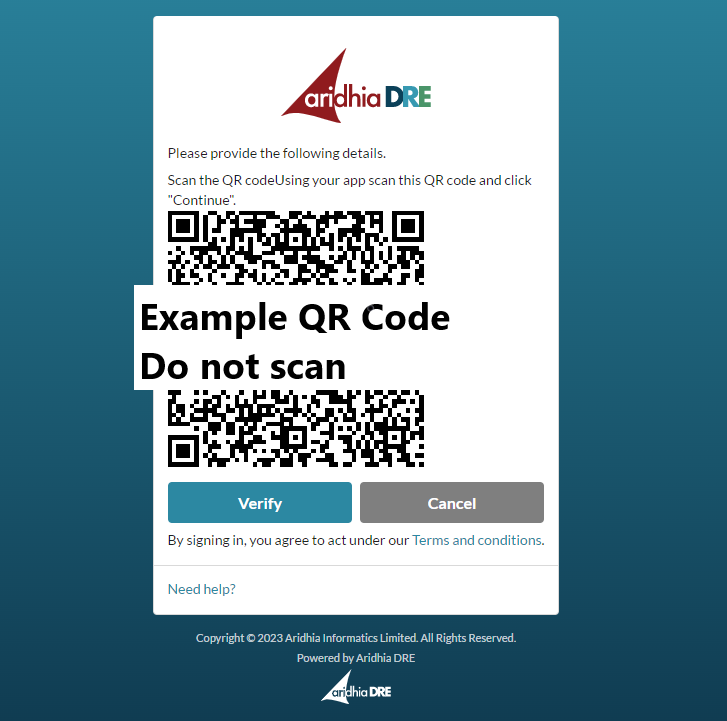
3. Scan the QR code with MS Authenticator
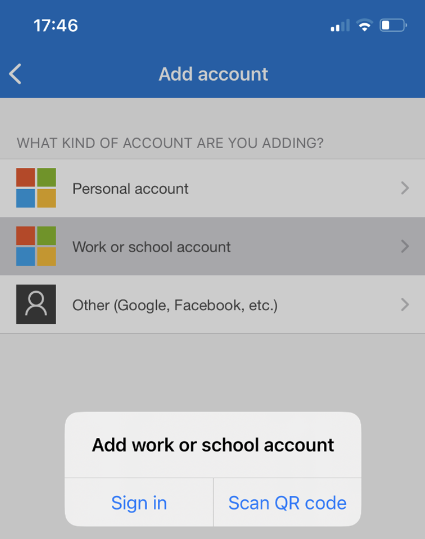
Using the ‘+’ at the top right of the app to add a new application to authenticator.

When adding an account, select ‘Work or school account’.
Select, ‘Scan QR code’ – this will open your camera app within the authenticator to scan the QR code. Frame the QR code within the box presented.
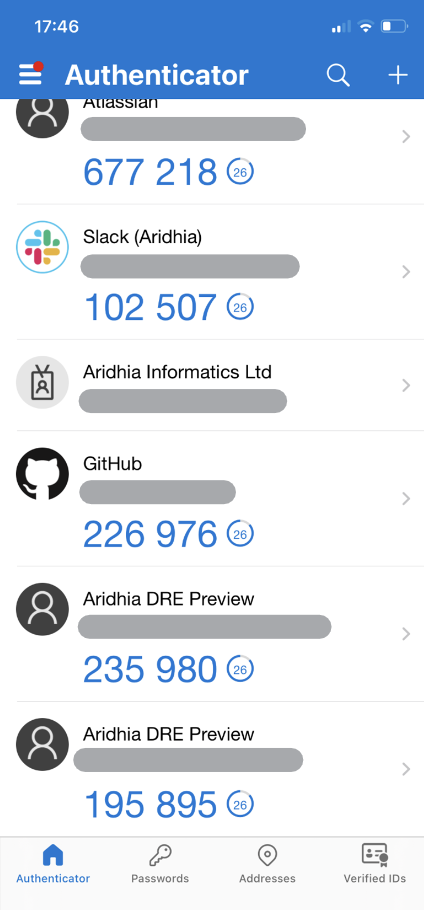
Your account will now appear in the list of applications and refresh a new verification code every 30 seconds.
4. Complete your log-in
Once scanned, you will now be prompted to enter the code from your application.

Open your app and find the code for your account.
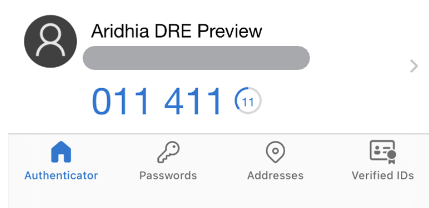
Enter the code at the login screen, select verify and you will be redirected to the appropriate landing page. From here on, when logging into your account you will be prompted to provide a verification code from Microsoft Authenticator. You will not be required to scan any further QR codes.
5. Confirm your details
You will be asked to confirm some details which you entered at the beginning of the registration process. You may also be asked to add some more details about yourself. You will also be asked to confirm that you are not a robot, this can be done by checking the box at the bottom of the form.

Fill in the fields on screen and click 'Create'.
If you encounter any issues signing up, please contact our Service Desk.
6. Await Authorisation
If your organisation administrator requires you to be manually assigned permissions when you first sign-in, you should now see an Awaiting Authorisation screen.

Your organisation administrator or Aridhia will give you the appropriate permissions to access the service and notify you when these permissions have been applied, at which point you will be able to access FAIR Data Services.
Alternatively, you may be auto-assigned permissions upon first sign-in if your instance of FAIR is configured for this.
De-Registering from FAIR
In order to de-register from FAIR, contact our Service Desk to either:
- Remove all your permissions (i.e. unapprove your user) while keeping your user present within the service (e.g. you will return later), or
- remove your user completely from the service.