Uploading files via an API
As well as uploading files via the user interface, it is also possible to do so using an API.
There are a few reasons you may wish to do this. Firstly, API tokens allow people who are not workspace members to upload to the workspace. Secondly, the use of the API allows users to upload data programmatically. For example, perhaps you have a regular stream of data coming into your study and you want it to be automatically pushed on to your workspace.
Generate an upload token
Follow the scribe or use the instructions below
First, go to the Upload dropdown menu and select Manage upload tokens. This will take you to a new tab showing existing tokens and a form to generate new ones.

If you have no valid upload tokens or have not generated any yet, a message will be shown which states this; if you do have active tokens, they will be shown here in a list.

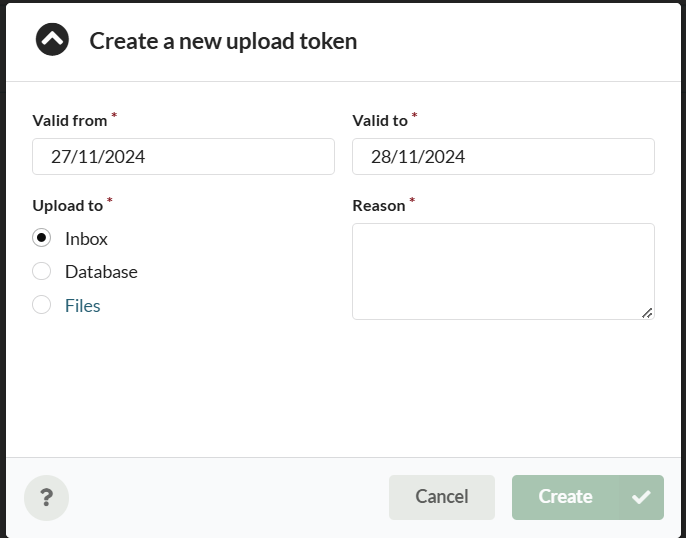
Select the 'Create new upload token' button and a dialogue will open.

Fill out the following information and select create to make a new token. All fields are mandatory.
- Valid from: the date the token should start on
- Valid to: The date the token should expire. The default is set to the maximum value, 30 days.
- Upload to: The destination for any uploads.
Inbox will send all files to the Inbox where they will need approval (see this article) .
Database should be used when uploading data only, uploaded csv and xml metadata files will automatically be processed on upload.
Files will allow the uploaded files to be directly saved to a location in the file list. Click on Files to select a subfolder.
- Reason: add the reason the token is being generated/ how it will be used.
Click Create
Your new token will be listed as the first entry in the table. Use the Copy button to copy your token to your clipboard.
Be aware that once you close the tab you will not be able to copy the token anymore. Save the copied token if you wish to use it again.
Download AzCopy
To use the API, you will need to download AzCopy to your computer. You can add the AzCopy directory to your path, which allows you to use AzCopy from any directory on your system.
If you choose not to add the AzCopy directory to your path, you'll have to first navigate to the location of your AzCopy executable before using it in the command line.

Upload your files
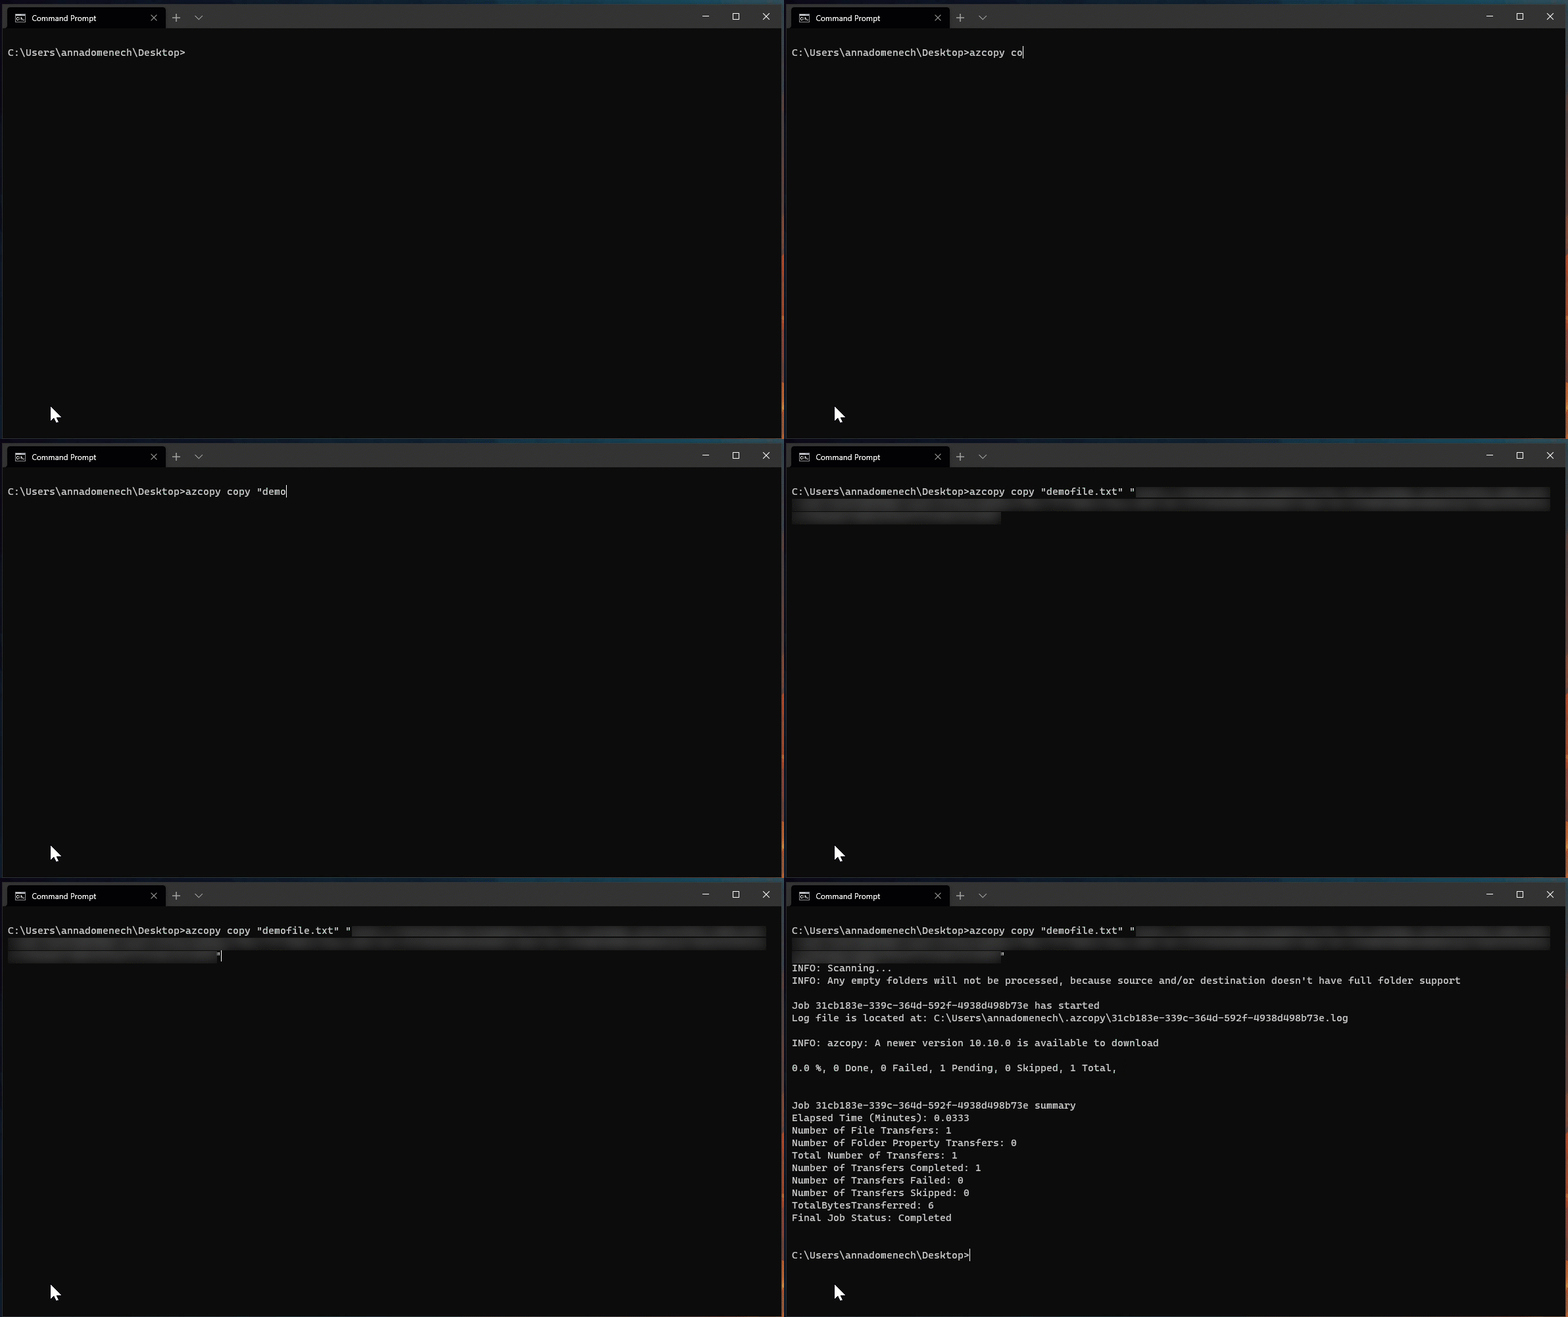
To run AzCopy on your own machine, if you did not add it to your path, first navigate to the location where you have installed AzCopy and run the following command:
azcopy copy "/path/to/your/file" "token"
If you want to recursively copy data (add all files in your folder) from a local directory, add the --recursive=true flag at the end.

Depending on whether you checked the 'Upload data to database' box, the files uploaded through an API will be found either in the Database tab or in the Inbox.
Viewing active and expired tokens
To view current or expired upload tokens, use the Manage upload tokens option in the Upload menu.

Any currently active tokens will be presented in the list; tokens can be archived by using the icon on the right hand side. Please note that it is not possible to edit or cancel active tokens from this UI; if you are concerned about an active token and think it should be invalidated, please contact Aridhia's service desk.
To view archived and expired tokens, use the slider in the header.
